Painting Like Piet LAB13
Welcome
Piet Mondrian was a famous artist. Some of his works have a style that seems imitable by a program that draws adjacent rectangles with certain colors. We have the power to make cheap, sorry, and embarrassing approximations to his artwork. So let us now (ab)use that power. We can at least practice with recursion along the way...and learn about Pygame!
What We Will Learn
Pygame Drawing shapes Filling shapes The QUIT event The MOUSEBUTTONDOWN event
Activity
Let’s draw!
But wait...Python doesn’t have a built-in drawing library. DID YOU THINK THIS WAS A JAVASCRIPT CLASS? 😅
But have no fear, a small core language with an ecosystem with tens of thousands of libraries, like Python, is just fine. Although we are only drawing in this lab, we will eventually be doing animations, so the library of choice for us is...Pygame. Let’s install it. Make sure your virtual environment is currently activated (you see the (env) on your prompt, hopefully), then:
pip install pygame
Take a peek in your VSCode Explorer to see that the library is there under the env folder.
A first Pygame program
You probably know what to do next. Make a lab13 folder in your ~/cmsi1010 folder. Let’s start with a file called rectangles.py. Here’s the Pygame program to draw a single rectangle, outlined in black, and filled with red. We saw how to define colors in the previous lab, so there’s something that should look familiar at least:
import pygame

# Always begin with initialization, sizing, and captioning
pygame.init()
screen = pygame.display.set_mode((800, 600))
pygame.display.set_caption('Just a Simple Rectangle')

# Not strictly necessary, but good practice for readability
WHITE = (255, 255, 255)
RED = (255, 0, 0)
BLACK = (0, 0, 0)


# A best practice is to do the drawing in its own function
def draw_scene():
    screen.fill(WHITE)  # "Clear the screen"
    the_rectangle = (300, 225, 200, 150)  # (x, y, width, height)
    pygame.draw.rect(screen, RED, the_rectangle)  # filled
    pygame.draw.rect(screen, BLACK, the_rectangle, 3)  # outlined
    pygame.display.flip()  # Put the drawing on the screen


# Draw the scene then wait for the QUIT event to come in
draw_scene()
while True:
    for event in pygame.event.get():
        if event.type == pygame.QUIT:
            pygame.quit()
            raise SystemExit
Well, that felt disturbingly long for the simple task we wanted to accomplish! But hang on, Pygame is a library for interactive applications, such as games, where there is a lot going on. So it needs to:
- Create, size, and title a window
- Deal with events (from the keyboard, mouse, etc.) which can arrive at any time
- Manage all of the drawing (and animation, if any), keeping the screen refreshed
So sure, you can expect a bit of code.
Because events can happen at any time, Pygame programs have a loop that begins with reading all the events that have queued up since the last time we checked, and for each one we have, handles the event if it is relevant to us. The only event we care about in this program is QUIT, which happens when a user closes the Pygame window.
Examples of other events include KEYDOWN, KEYUP, MOUSEMOTION, MOUSEBUTTONUP, and MOUSEBUTTONDOWN. You’ll find information about these in the Pygame documentation.
What’s the flip for?Drawing a scene ends with a call to
pygame.display.flip(). This is because drawing takes place on an off-screen “buffer”, then theflipcall brings this buffer to the display screen while the old display buffer becomes the offscreen buffer on to which the next frame is drawn. This technique is called double-buffering and is used to prevent flickering.
The while-true loop—beginning with event handling, doing some drawing, and finishing with a flip—is called the game loop, or sometimes the event loop.
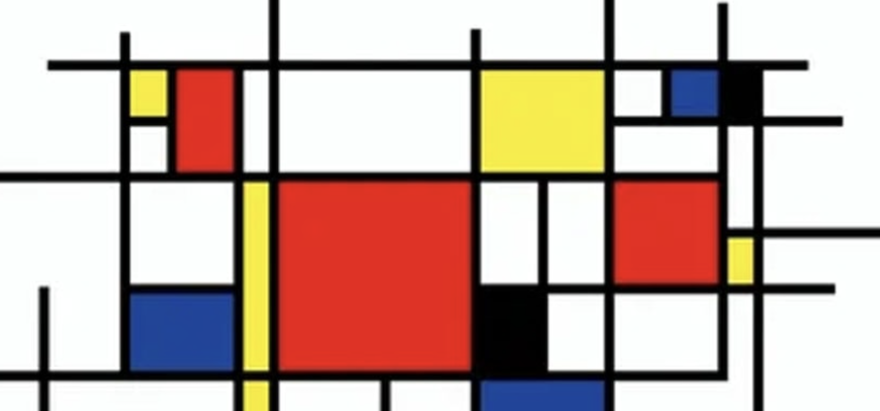
Splitting rectangles, recursively!
Let’s jump right into crafting some Mondrian fakes. Add piet.py to your lab13 folder. Here’s the code:
"""A simple generator of Mondrian-style colored rectangles.
Based on an original JavaScript implementation by Max Halford
at https://maxhalford.github.io/blog/mondrian/
"""

import random
import pygame

pygame.init()
WIDTH, HEIGHT = 800, 600
screen = pygame.display.set_mode((WIDTH, HEIGHT))
pygame.display.set_caption("Mondrian")

COLORS = [
    # Most of the squares will be white, so it’s included many times.
    # That way, the random.choice function will pick white with a
    # higher probability than the other colors.
    pygame.Color("white"),
    pygame.Color("white"),
    pygame.Color("white"),
    pygame.Color("white"),
    pygame.Color("black"),
    pygame.Color("red"),
    pygame.Color("blue"),
    pygame.Color("yellow"),
]

# We don't want any of the rectangles to be smaller than a percentage of
# the width and height of the screen.
X_PADDING = int(WIDTH * 0.05)
Y_PADDING = int(HEIGHT * 0.05)
LINE_WIDTH = 5


def draw_and_split(rect, depth):
    # First, draw the rectangle, filled and outlined
    pygame.draw.rect(screen, random.choice(COLORS), rect)
    pygame.draw.rect(screen, pygame.Color("black"), rect, LINE_WIDTH)

    # Determine whether the recursion should stop, and if so, return
    if depth == 0:
        # We've gone as deep as we want to go
        return
    if rect.width < 2 * X_PADDING or rect.height < 2 * Y_PADDING:
        # Rectangle is too small to split
        return

    # If we get here, we need to split. Always split in the direction that
    # has the most space, either horizontally or vertically. To split, choose
    # a random value within the longer axis, but not too close to the edges
    # to avoid creating rectangles that are too small. This is where the
    # X_PADDING and Y_PADDING come in. The two rectangles on either side of
    # the split will be called r1 and r2, and they will be drawn recursively.
    if rect.width > rect.height:
        x = random.randint(rect.left + X_PADDING, rect.right - X_PADDING)
        r1 = pygame.Rect(rect.left, rect.top, x - rect.left, rect.height)
        r2 = pygame.Rect(x, rect.top, rect.right - x, rect.height)
    else:
        y = random.randint(rect.top + Y_PADDING, rect.bottom - Y_PADDING)
        r1 = pygame.Rect(rect.left, rect.top, rect.width, y - rect.top)
        r2 = pygame.Rect(rect.left, y, rect.width, rect.bottom - y)

    draw_and_split(r1, depth - 1)
    draw_and_split(r2, depth - 1)


def draw_scene():
    # Clear screen then draw outer rectangle to take up the whole display
    screen.fill(pygame.Color("white"))
    outer_rectangle = pygame.Rect(0, 0, WIDTH, HEIGHT)
    draw_and_split(outer_rectangle, 5)
    pygame.display.flip()


draw_scene()
while True:
    for event in pygame.event.get():
        if event.type == pygame.QUIT:
            pygame.display.quit()
            raise SystemExit
        elif event.type == pygame.MOUSEBUTTONDOWN:
            # A click "starts over" with a new scene!
            draw_scene()
Run the program. Note that clicking anywhere in the popup window with generate a new random image.
We’ll spend time in class dissecting the code, paying attention to how the recursion stops. It’s always a good idea to know when the recursion stops.
Challenges
This lab is mostly experimentation, so there are no extensions of variations required, unless you have some outside-the-box ideas like...oh...maybe using circles instead of rectangles.
For your lab time, simply vary the values used in the program, and take notes on the effects that these changes have. From them, infer their purpose. If you find the names of the variables or parameters confusing, rename them to your liking.
Further Study
Now that you are up and running with Pygame, review and dive deeper with any introductory Pygame tutorial you find on the web. You might also like to browse the original article on which the code here is based. It’s described in JavaScript, so the language-specific details might not be of interest to you, but the thinking behind the development of program should be of interest.
Among the many little articles about Pygame out there, this one talks about the event loop in some detail, and might be interesting if you wish to do more with this library.
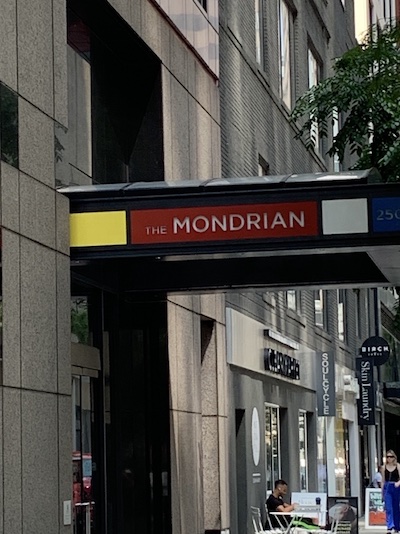
And next time you are in New York:
Summary
We’ve covered:
- Installing Pygame into your virtual environment
- A simple Pygame program for drawing a rectangle
- Outlining vs. filling
- Events
- Quitting a Pygame program
- Double-buffering
- A Pygame program to generate random Mondrian-like images
Recall Practice
Here are some questions useful for your spaced repetition learning. Many of the answers are not found on this page. Some will have popped up in lecture. Others will require you to do your own research.
- What command installs Pygame?
pip install pygame. - What statements are used to start a Pygame program (before the game loop, that is)?
pygame.init()pygame.display.set_mode((width, height))pygame.display.set_caption(window_title). - How is the game loop structured? The game loop consists of an infinite loop that processes events, draws the current frame, and updates the display. It typically includes a check for quitting the program.
- What is usually the first thing done in drawing phase of the game loop? The screen is cleared, usually by filling it with a background color.
- What is the purpose of the
pygame.display.flip()call?It brings the off-screen buffer to the display screen while the old display buffer becomes the offscreen buffer on to which the next frame is drawn. - How do we fetch all the events that happened since the last animation frame?
pygame.event.get() - What is the purpose of the
pygame.draw.rect()call without awidthargument?It draws a filled-in rectangle on the screen. - What is the purpose of the
pygame.draw.rect(..., width=3)call?It draws a rectangle outlined with a 3-pixel width. - What is the purpose of the
pygame.Rect()call?It creates a rectangle object. Rectangle objects have lots of interesting methods to make working with them easier than doing everything yourself with simple tuples. - What is the purpose of the
pygame.init()call?It initializes all the Pygame modules. - What is the purpose of the
pygame.quit()call?It quits Pygame and closes the window. - What is the purpose of the
pygame.event.type == pygame.QUITcheck?It checks if the user has clicked the close button on the window, allowing the program to exit gracefully.